
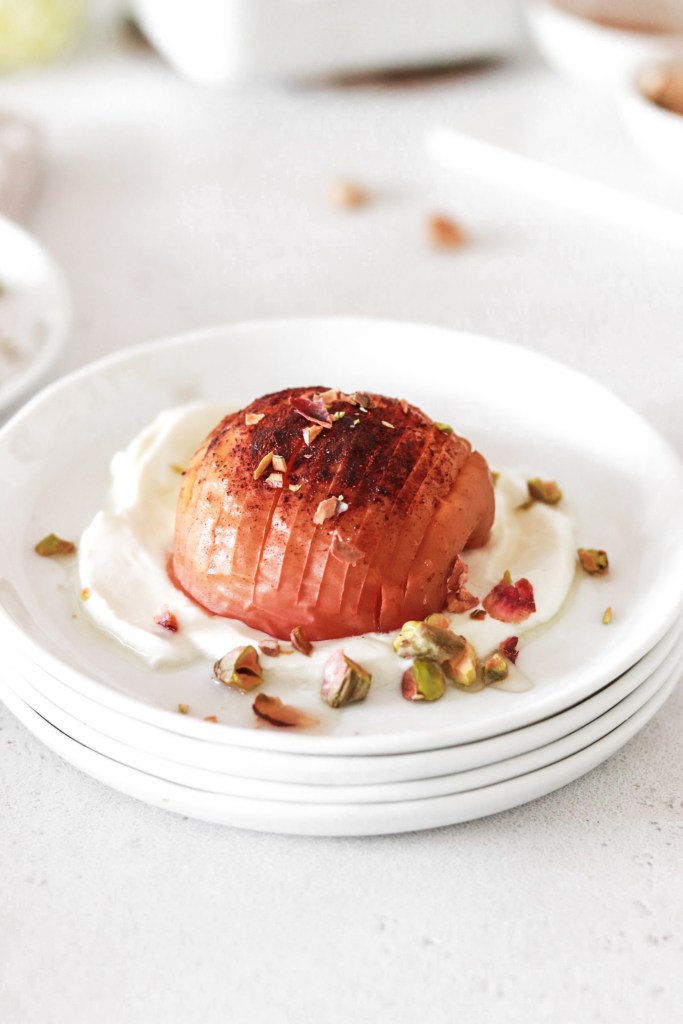
This recipe is for delicious Hasselbacked Apples. They are both easy, to make, healthy and taste super delicious. These apples are served warm, tender, spiced with cinnamon and topped with agave or fiber syrup and crunchy pistachio nuts. They are perfect to serve both for breakfast, afternoon snack or dessert. And they are both vegan, gluten, grain & sugar free.
If you’re Swedish there is no doubt you’ve had Hasselback potatoes. If you’re not Swedish Im guessing you have heard about them and maybe also had the change to taste them. They are delicious! No further description needed. And if you haven’t tried them you really have to! This “hasselbacking” method is genius and should be used for other purposes as well! I’ve tried hasselbacking most of the fruits and vegetables I like. Pumpkins, pineapples, zucchinis, aubergines, sweet potatoes, kiwis, tomatoes… ok I thing you get the point. I’ve been “hasselbacking” my way though all my favorite fruits and veggies! And it kind of never goes wrong! But amongst all the hasselbacked dishes I’ve made I really had to share this one with you! Hasselbacked apples. Do I even have to describe this dish further? I guess I don’t have to, but I will. Think of a warm, tender, soft and flavorful baked apple, sliced with coconut oil/vegan butter drizzling down between the slices… and then topped with cinnamon. Ok, I need to take a break just to go and make a new batch of these delicious apples!! I made my apples soft and tender, but you can also turn on the broiler in the oven at the end and make them a bit more crunchy on the slices giving them such a nice texture and roasted feeling. These hasselbacked apples are perfect to serve for breakfast or an afternoon snack with some yogurt or as a dessert with ice cream on top!
A few tips:
- Use sweet apples to get the best result.
- Slice the apples thinly, not going all the way though.
- If you have a big soup spoon then put your apple half into it and then slice the apple. That prevents you from slicing it all the way though.
- I baked my apples without boring them. But if you prefer more crunchy edges put the broiler on for 5-10 minutes. But keep a close eye on them so they donate get burnt.
- Serve these apples for brakfast or snack with some yogurt….
- Or serve them as a dessert either with yogurts or topped with ice cream.

Ingredients for these Hasselback Apples:
- Apples
- Cinnamon
- Coconut oil or vegan butter
- (Vegan) yogurt
- Pistachio nuts
- Fiber syrup or agave

Other recipes you might like:
- Granola Nut Stuffed Baked Pears (Vegan, Gluten & Sugar Free)
- Roasted Persimmon with Yogurt & Nuts
- Yogurt with Home Made Plum Compote
- Healthy Chocolate Mousse (Vegan & Sugar Free)

Hasselback Apples (Gluten, Grain & Sugar Free)
Ingredients
- 2 Apples Divided in two and cored
- 2 tsp Cinnamon
- 1 tsp Coconut oil or vegan butter
- 6 tbsp (Vegan) yogurt
- 2 tbsp Pistachio nuts roughly chopped
- 2 tbsp Fiber syrup or agave
Instructions
- Preheat the oven to 175 degrees Celsius.
- Divide the apples in two and core them.
- Using a shar knife slice thin scores in the apple, going far down but not all the way.
- Add the apples on a parchment covered baking sheet, brush with coconut oil or vegan butter and top with cinnamon.
- Bake in the oven for 20 minutes.
- Cover the apples with aluminium foil and bake in the oven for 15-20 more minutes. Until the apples are soft.
- Place about 1-1 1/2 tablespoons of yogurt on plates.
- Add half an apple on each plate.
- Top with fiber syrup or agave and riughly chopped pistachio nuts.
One thought on “Hasselback Apples (Vegan, Gluten, Grain & Sugar Free)”